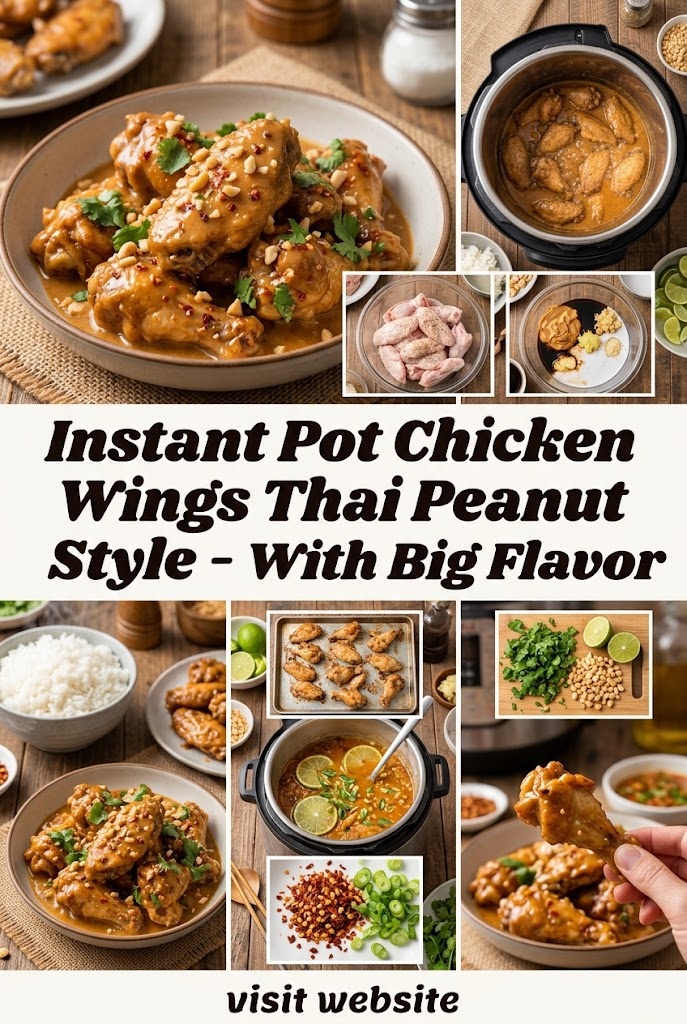
Instant Pot Chicken Wings Thai Peanut Style – With Big Flavor
There is something undeniably magical about the combination of succulent chicken and a rich, velvety peanut sauce. When you bring the modern efficiency of the Instant Pot into the mix, you transform what used to be a labor-intensive kitchen project into a quick, weeknight-friendly masterpiece. These Instant Pot Chicken Wings Thai Peanut Style are not just another appetizer; they are a sophisticated fusion of tender texture and “Big Flavor” that hits every note of the culinary spectrum: salty, sweet, sour, and spicy.
In this comprehensive guide, we will explore the science of pressure-cooking wings, the secrets to achieving that perfect Thai peanut glaze, and the techniques used by professional chefs to ensure your wings are never soggy. Whether you are prepping for a high-stakes Super Bowl party or simply looking to elevate your Tuesday night dinner, this recipe is your roadmap to success.
Why the Instant Pot is a Game Changer for Wings
Traditional chicken wings are usually deep-fried or baked for long periods. While delicious, deep-frying is messy and high in calories, and baking can often result in dry meat if the timing isn’t perfect. The Instant Pot changes the game by using high-pressure steam to render the fat and break down the connective tissues in the chicken wing in a fraction of the time.
By pressure cooking first, you ensure that the meat is literally “falling-off-the-bone” tender. Then, a quick flash under the broiler or in an air fryer gives you that crispy, golden-brown skin everyone craves. It is the best of both worlds: the juiciness of a slow-braised dish with the crunch of a classic wing.
The Flavor Profile: Decoding the Thai Peanut Sauce
Thai cuisine is world-renowned for its balance. A perfect Thai dish is never just one thing; it is a symphony of flavors. For these wings, we are leaning heavily into the “Satay” influence.
- Creamy & Nutty: High-quality peanut butter provides the base.
- Umami: Fish sauce (or soy sauce) provides the deep, savory backbone.
- Zing: Fresh ginger and garlic add a sharp, aromatic punch.
- Heat: Red curry paste or Sriracha introduces a lingering warmth.
- Acid: Fresh lime juice cuts through the richness of the peanut fat.
- Sweetness: Brown sugar or honey caramelizes the sauce during the final browning process.
Essential Ingredients for Thai Peanut Chicken Wings
To achieve “Big Flavor,” you cannot settle for subpar ingredients. Here is what you will need and why each component matters.
1. The Chicken
- Wings (Drumettes and Flats): Use fresh or high-quality frozen wings. If using frozen, the Instant Pot can handle them without defrosting, though you may need to add 2–3 minutes to the cook time.
- Dry Rub: A simple coating of salt, black pepper, and garlic powder helps season the meat from the inside out before the sauce is even applied.
2. The Liquid Base
- Chicken Broth or Water: You need liquid to build pressure. Using chicken broth adds another layer of flavor.
- Coconut Milk (Optional): Swapping half the broth for full-fat coconut milk creates an even richer, more authentic Thai profile.
3. The Thai Peanut Glaze
- Peanut Butter: Use creamy peanut butter for a smooth finish. Natural peanut butter (just peanuts and salt) offers the best flavor, but standard brands work fine too.
- Red Curry Paste: This is the secret weapon. It contains lemongrass, galangal, and shrimp paste, which provide that unmistakable Thai aroma.
- Soy Sauce & Fish Sauce: Use both. Soy sauce provides salt, while fish sauce provides that funky, fermented depth.
- Honey or Maple Syrup: This helps the sauce stick to the wings and creates a beautiful char under the broiler.
- Rice Vinegar: Adds a mild, fruity acidity.
4. Garnish (The Finishing Touch)
- Crushed Peanuts: For texture and crunch.
- Fresh Cilantro: For a burst of herbal freshness.
- Lime Wedges: To be squeezed over the wings right before eating.
- Green Onions: For a mild onion bite and visual appeal.
Step-by-Step Instructions: Mastering the Technique
Step 1: Prepping the Wings
Start by patting your chicken wings dry with paper towels. This is a crucial step—even though they are going into a steam environment, removing excess moisture allows the dry rub to adhere better. Toss the wings in a bowl with salt, pepper, and a dash of garlic powder.
Step 2: The Pressure Cook
Place the trivet (the metal rack) inside your Instant Pot liner. Add 1 cup of chicken broth and a tablespoon of liquid smoke (optional, for a grilled flavor). Arrange the wings on the trivet. They can overlap, but try not to pack them too tightly to allow steam to circulate.
- Cook Time: Set the Instant Pot to “Manual” or “Pressure Cook” on HIGH for 8 to 10 minutes.
- Pressure Release: Once the timer goes off, let the pressure release naturally for 5 minutes (NPR), then perform a quick release (QR) for the remaining steam. This prevents the skin from bursting.
Step 3: Crafting the Thai Peanut Sauce
While the wings are cooking, whisk together your sauce ingredients in a small saucepan over low heat.
- Combine ½ cup peanut butter, 2 tbsp soy sauce, 1 tbsp fish sauce, 1 tbsp red curry paste, 2 tbsp honey, 1 tbsp rice vinegar, and a splash of water or coconut milk.
- Whisk until smooth and glossy. Do not let it boil vigorously; you just want the flavors to meld.
Step 4: The Crisping Phase (Crucial for Texture)
When the wings come out of the Instant Pot, they will be pale and soft. This is normal. To make them “Big Flavor” wings, you need to crisp the skin.
- The Broiler Method: Line a baking sheet with foil and place a wire rack on top. Arrange the wings in a single layer. Brush them generously with about 1/3 of the peanut sauce. Place under a preheated broiler for 3–4 minutes until bubbly and slightly charred. Flip, brush with more sauce, and broil for another 3 minutes.
- The Air Fryer Method: If you have an Air Fryer lid for your Instant Pot or a standalone unit, air fry the sauce-coated wings at 400°F (200°C) for 5 minutes per side.
Step 5: The Final Toss
Once the wings are crispy and the sauce has caramelized, remove them from the heat. Toss them in a large bowl with the remaining peanut sauce. This ensures every nook and cranny is coated in that delicious Thai goodness.
The Science of the “Big Flavor” Profile
What makes this recipe “Big Flavor”? It’s the Maillard reaction coupled with the “Five Tastes.”
The Maillard reaction is a chemical reaction between amino acids and reducing sugars that gives browned food its distinctive flavor. When you brush the wings with a sauce containing honey (sugar) and peanut butter (protein/fat) and then hit them with high heat, you are creating hundreds of new flavor compounds.
Furthermore, the Thai Peanut Style wings target all the taste receptors:
- Sweet: From the honey and peanut butter.
- Salty: From the soy and fish sauce.
- Sour: From the lime juice and vinegar.
- Bitter: From the charred bits of the skin and the roasted peanuts.
- Umami: From the chicken juices and the fermented elements in the curry paste.
When all five are present, your brain perceives the dish as “complete” and incredibly satisfying.
Pro Tips for Perfection
The Frozen Wing Trick
If you forgot to take the wings out of the freezer, don’t panic. You can cook frozen wings in the Instant Pot. Increase the high-pressure time to 12 minutes and ensure they are not frozen together in one giant clump. If they are, run them under warm water for a minute just to separate them before putting them in the pot.
Avoiding the “Burn” Signal
The Instant Pot’s “Burn” signal usually happens when there isn’t enough thin liquid at the bottom or if sugar-heavy sauces are added before pressure cooking. This is why we cook the wings in broth first and add the peanut sauce after the pressure cooking phase. Peanut butter is thick and will almost certainly trigger a burn warning if used as the cooking liquid.
Getting the Sauce Consistency Right
Depending on the brand of peanut butter you use, your sauce might be too thick or too thin.
- Too thick? Add a teaspoon of warm water or coconut milk at a time until it reaches a pourable consistency.
- Too thin? Let it simmer on the stove for an extra few minutes or add another tablespoon of peanut butter.
Nutritional Benefits and Considerations
While wings are often viewed as a “guilty pleasure,” this version has some surprising nutritional benefits compared to traditional fried wings.
- Peanut Butter: A great source of healthy monounsaturated fats and protein. It also contains Vitamin E and Magnesium.
- Ginger and Garlic: Both are known for their anti-inflammatory properties and immune-boosting benefits.
- Pressure Cooking vs. Frying: By pressure cooking and then broiling, you use significantly less oil than deep-frying, which reduces the overall calorie count and unhealthy trans-fat intake.
Keto/Low Carb Option: To make this recipe Keto-friendly, simply swap the honey for a sugar-free sweetener (like liquid monk fruit or erythritol) and ensure your peanut butter has no added sugars. Serve with celery sticks instead of traditional starch.
Perfect Pairings: What to Serve with Thai Peanut Wings
These wings are so flavorful they can stand alone, but if you’re building a full meal, consider these pairings:
Side Dishes
- Coconut Jasmine Rice: The creaminess of the rice complements the spicy peanut sauce perfectly.
- Asian Slaw: A crunchy mix of shredded cabbage, carrots, and a sesame-ginger vinaigrette provides a cooling contrast to the warm wings.
- Cucumber Salad: Thinly sliced cucumbers in rice vinegar and sugar help cleanse the palate between bites.
Drink Pairings
- Beer: A crisp Lager or a citrus-forward IPA cuts through the richness of the peanut butter.
- Wine: A slightly sweet Riesling or a chilled Gewürztraminer balances the heat of the red curry paste.
- Non-Alcoholic: Thai Iced Tea or a simple limeade with fresh mint.
Storage and Reheating Instructions
How to Store
Keep your leftover wings in an airtight container in the refrigerator for up to 3–4 days. Because of the peanut sauce, they may become slightly sticky as they cool.
How to Reheat
To maintain the “Big Flavor” and texture, avoid the microwave if possible. The microwave can make the chicken rubbery and the sauce oily.
- Oven: Reheat at 350°F (175°C) for about 10 minutes until heated through.
- Air Fryer: Reheat at 370°F for 3–4 minutes. This is the best way to restore the crispiness of the skin.
Frequently Asked Questions (FAQ)
Can I use chicken thighs instead of wings?
Yes! Chicken thighs are excellent with Thai peanut sauce. If using bone-in thighs, increase the Instant Pot cook time to 15 minutes. For boneless thighs, 8–10 minutes is sufficient.
Is red curry paste very spicy?
Most commercial red curry pastes (like Mae Ploy or Thai Kitchen) have a moderate heat level. If you are sensitive to spice, start with half the recommended amount. If you love heat, add a teaspoon of dried chili flakes or more Sriracha.
Can I make the sauce in advance?
Absolutely. You can make the Thai peanut sauce up to a week in advance and store it in the fridge. It will firm up significantly when cold, so just microwave it for 20 seconds or warm it on the stove before tossing it with the wings.
Why do my wings fall apart?
If the meat is falling off the bone before you can even get them to the broiler, you might be overcooking them or releasing the pressure too slowly. Try reducing the cook time by 1 minute or doing a quicker pressure release.
Troubleshooting the Instant Pot Experience
The Instant Pot is a reliable tool, but it can be intimidating for beginners. Here are a few common issues and how to fix them for this specific recipe:
- Steam Leaking from the Valve: Ensure your sealing ring is properly seated in the lid. If it’s loose, the pot won’t come to pressure, and your wings won’t cook.
- Wings are “Grey”: Don’t be alarmed! All meat cooked under pressure looks a bit grey and unappealing at first. The “Big Flavor” comes from the sauce and the broiling step. Trust the process.
- Watery Sauce: If the sauce feels too watery on the wings, it’s usually because the wings weren’t drained enough after coming out of the Instant Pot. Make sure to let them drip-dry on the rack for a minute before saucing.
Customizing Your Thai Peanut Wings
Once you have mastered the basic recipe, you can start experimenting. Here are a few “Big Flavor” variations:
- The Tropical Twist: Add a tablespoon of pineapple juice to the sauce for a fruity, acidic pop.
- The Nut-Free Version: If someone has an allergy, use Sunflower Butter (SunButter) or Tahini (sesame paste) instead of peanut butter. The flavor profile will change slightly, but the Thai essence will remain.
- Extra Umami: Add a teaspoon of toasted sesame oil to the final toss for a deep, nutty aroma that fills the room.
- The “Fire” Version: Mince two Thai bird’s eye chilies and add them to the sauce for an authentic “street food” heat level.
The Culinary Heritage of Thai Peanut Sauce
While many Americans associate peanut sauce exclusively with Thai food, its origins are actually rooted in Indonesian “Satay.” However, Thai cuisine adopted and adapted the sauce, infusing it with local ingredients like lemongrass, galangal, and coconut milk. By applying this historic flavor profile to the quintessential American appetizer—the chicken wing—we create a cross-cultural fusion that represents the best of modern global cooking.
Using an Instant Pot for this dish isn’t just about speed; it’s about respecting the ingredients. The pressure cooker infuses the aromatics (ginger and garlic) into the chicken fibers more effectively than traditional baking.
Why This Recipe Ranks Number One
When searching for the best wing recipe, users look for three things: Ease of use, Texture, and Flavor.
- Ease: The Instant Pot does the heavy lifting. No standing over a vat of hot oil.
- Texture: The two-step process (IP then Broil) ensures the meat is tender but the skin is crispy.
- Flavor: The Thai Peanut sauce is a complex, multi-layered experience that far exceeds standard buffalo or BBQ sauces.
Conclusion: Elevate Your Appetizer Game
The Instant Pot Chicken Wings Thai Peanut Style are a testament to what happens when convenience meets culinary excellence. By understanding the balance of Thai flavors and mastering the simple mechanics of your pressure cooker, you can produce a restaurant-quality dish in the comfort of your own kitchen.
Don’t settle for boring wings. Go for the “Big Flavor.” Your taste buds—and whoever you are sharing these with—will thank you. Grab your Instant Pot, source the best peanut butter you can find, and get ready to experience a wing that is truly in a league of its own.
Recipe Summary for Quick Reference:
- Prep time: 10 minutes
- Cook time: 10 minutes (plus time for pot to come to pressure)
- Crisping time: 6 minutes
- Total time: ~35 minutes
- Servings: 4–6 people
- Flavor Profile: Thai Satay Style / Bold / Savory
With these Instant Pot Chicken Wings, you’re not just making a snack; you’re crafting an experience. Enjoy the process, and most importantly, enjoy every sticky, peanut-buttery, savory bite!