
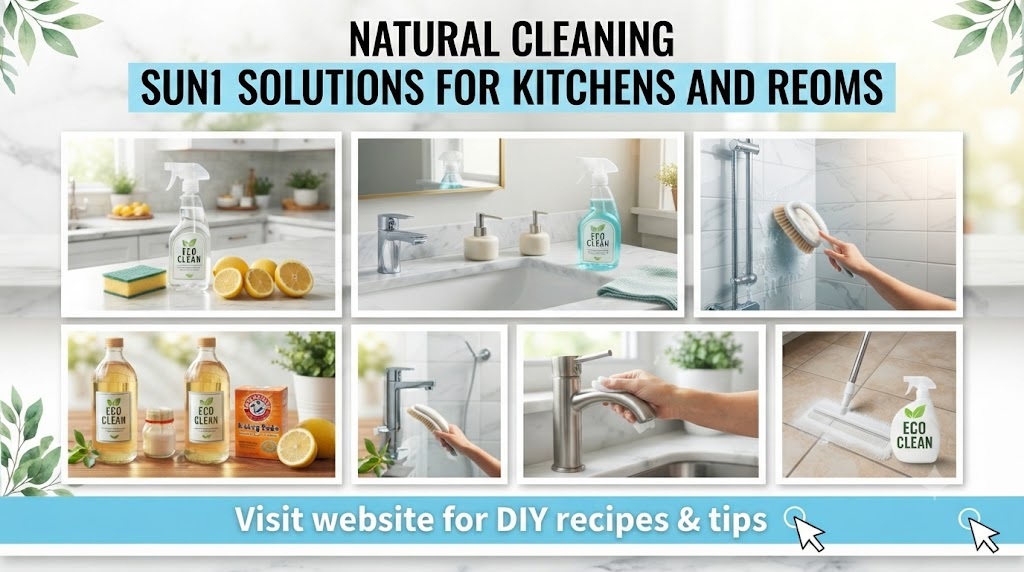
Natural Cleaning Solutions for Kitchens and Bathrooms
The Ultimate Guide to Natural Cleaning: Transforming Your Kitchen and Bathroom Without Chemicals
The modern home is often a sanctuary, a place of rest, and a hub of activity. However, beneath the surface of many pristine-looking houses lies a hidden cocktail of synthetic chemicals. From the pungent aroma of bleach to the artificial “mountain breeze” of aerosol sprays, the products we use to clean our most vital spaces—the kitchen where we prepare food and the bathroom where we care for our bodies—are often more hazardous than the dirt they aim to remove.
The transition toward natural cleaning solutions isn’t just a trend for the eco-conscious; it is a fundamental shift toward health, sustainability, and economic wisdom. This comprehensive guide explores every corner of your kitchen and bathroom, providing deep-dive solutions, the science of natural chemistry, and DIY recipes that actually work.
Part I: The Philosophy and Science of Natural Cleaning
Why Go Natural?
Before we pick up a spray bottle, we must understand the “why.” Traditional cleaning supplies often contain Volatile Organic Compounds (VOCs), phthalates, and ammonia. These substances can trigger asthma, irritate the skin, and contribute to long-term environmental degradation when they enter our water systems.
- Health First: Reducing the toxic load in your home improves indoor air quality. This is especially crucial for households with children, pets, or individuals with respiratory sensitivities.
- Environmental Impact: Natural ingredients like vinegar and baking soda are biodegradable. They don’t poison aquatic life or persist in the ecosystem for decades.
- Cost-Effectiveness: Most natural cleaning agents cost pennies per ounce. You can replace an entire aisle of specialized cleaners with five or six basic household staples.
- Simplicity: No more cluttered cabinets filled with twenty different bottles. A few versatile ingredients can handle 95% of your cleaning needs.
The Chemistry of Clean
Cleaning is essentially a chemical reaction. To clean effectively without harsh toxins, you need to understand the pH scale:
- Acids (pH 0-6): Vinegar, lemon juice, and citric acid. These are excellent for breaking down alkaline messes like hard water stains, soap scum, and mineral deposits.
- Bases/Alkalines (pH 8-14): Baking soda, washing soda, and borax. These are superior for cutting through grease, proteins, and organic matter.
- Surfactants: Castile soap or sal suds. These molecules have one end that attaches to water and one that attaches to oil, allowing dirt to be washed away.
The Golden Rule of Mixing: Never mix vinegar (acid) and bleach (strong base/oxidizer)—it creates toxic chlorine gas. Likewise, while mixing baking soda and vinegar creates a fun fizz, they eventually neutralize each other into salt water. Use the fizz for mechanical agitation, but don’t store them mixed together.
Part II: The Natural Cleaning Toolkit
Before embarking on your cleaning journey, assemble your “Green Caddy.”
The Core Ingredients
- White Distilled Vinegar: The workhorse of natural cleaning. High acidity kills some bacteria and dissolves minerals.
- Baking Soda (Sodium Bicarbonate): A mild abrasive and deodorizer.
- Castile Soap: A vegetable-based soap (like Dr. Bronner’s) that is gentle yet effective.
- Hydrogen Peroxide (3%): A natural whitener and disinfectant. It’s essentially water with an extra oxygen molecule.
- Lemons: Natural bleach and degreaser with a fresh scent.
- Washing Soda (Sodium Carbonate): A stronger cousin to baking soda, excellent for heavy-duty degreasing.
- Essential Oils: Tea tree (antifungal), Lemon (degreasing), Lavender (antibacterial/scent), and Eucalyptus (antimicrobial).
The Essential Hardware
- Glass Spray Bottles: Essential oils can degrade plastic over time.
- Microfiber Cloths: They trap dirt rather than spreading it.
- Bamboo Scrub Brushes: For heavy-duty scrubbing without scratching.
- Old Toothbrushes: Perfect for grout and tight corners.
Part III: Deep Cleaning the Kitchen
The kitchen is the heart of the home, but it’s also a breeding ground for bacteria like Salmonella and E. coli. Natural solutions can sanitize effectively while keeping your food preparation surfaces safe.
1. The All-Purpose Kitchen Surface Cleaner
This is your “everyday” spray for countertops, tables, and the exterior of appliances.
- Recipe: 1 cup distilled water, 1 cup white vinegar, 15 drops of lemon essential oil.
- Note on Stone: If you have granite or marble, do not use vinegar. The acid will etch the stone. Instead, use 1/4 cup rubbing alcohol, 3 drops of Castile soap, and 1.5 cups of water.
2. The Oven: Conquering the Grease Giant
Commercial oven cleaners are among the most toxic products in the home. You can achieve the same results with patience and baking soda.
- The Method:
- Remove oven racks and soak them in the sink with warm water and Castile soap.
- Make a thick paste of baking soda and water (consistency of toothpaste).
- Coat the entire interior of the oven with the paste. It will turn brown as it absorbs grease.
- Let it sit for at least 8 hours or overnight.
- Wipe out the paste with a damp cloth.
- Spray any remaining residue with a little vinegar; it will react with the baking soda to form a foam that is easily wiped away.
3. The Microwave Steam Clean
Don’t scrub those exploded food splatters. Steam them.
- The Method: Place a bowl of water with two halves of a squeezed lemon inside the microwave. Run on high for 5 minutes. Let it sit (closed) for another 5 minutes. The steam loosens the grime, and the lemon oils break down the grease. Wipe clean with a single pass.
4. The Sink and Garbage Disposal
Sinks harbor more bacteria than toilets.
- The Scrub: Sprinkle baking soda liberally over the sink. Scrub with a sponge. The baking soda acts as a mild abrasive that won’t scratch stainless steel or porcelain.
- The Drain: Pour 1/2 cup baking soda down the drain, followed by 1/2 cup vinegar. Let it fizz for 10 minutes, then flush with boiling water.
- Disposal Refresh: Toss in a few leftover lemon rinds and a handful of ice cubes. Run the disposal. The ice sharpens the blades, and the lemon deodorizes.
5. The Refrigerator: Food-Safe Sanitization
Since this is where you store food, you want zero chemical residue.
- Solution: 2 tablespoons baking soda in 1 quart of warm water.
- Why: Baking soda doesn’t just clean; it absorbs the odors often trapped in the plastic lining of the fridge. For stubborn sticky spots, use a drop of pure vanilla extract on a cloth—it acts as a mild solvent and leaves a pleasant scent.
6. Dishwasher Detox
Over time, limescale and grease build up in the internal components.
- The Method: Place a dishwasher-safe bowl filled with 1 cup of white vinegar on the top rack. Run a hot cycle with no other dishes. This dissolves mineral buildup and cleans the spray arms.
Part IV: Deep Cleaning the Bathroom
The bathroom presents two main challenges: soap scum and humidity-driven mold/mildew.
1. The “Magic” Tub and Tile Scrubber
Soap scum is a combination of body oils and mineral deposits. It requires a surfactant and an acid.
- The Recipe: 1 cup warm white vinegar mixed with 1 cup of Dawn dish soap (or a strong Castile soap).
- The Method: Spray the mixture onto the tub and tiles. Let it sit for 30 minutes. The soap clings to the walls while the vinegar dissolves the minerals. Rinse with warm water. This is arguably more effective than any store-bought “scrubbing bubbles” product.
2. Grout Restoration
Grout is porous and traps dirt and mold.
- The Recipe: 3 parts baking soda to 1 part hydrogen peroxide.
- The Method: Apply the paste to grout lines with an old toothbrush. Let sit for 15 minutes. Scrub gently and rinse. The peroxide acts as a natural whitener and kills mold spores.
3. The Toilet: No Bleach Needed
Bleach actually doesn’t “clean” a toilet; it just whitens the grime. To actually clean it:
- The Method: Pour 1 cup of borax (or baking soda) into the bowl. Add 1/2 cup vinegar. Let it sit for 20 minutes. Scrub with a toilet brush.
- For Rings: Use a wet pumice stone. It sounds scary, but as long as the stone and the surface are wet, it will remove hard water rings from porcelain without scratching.
4. Glass and Mirrors: The Streak-Free Secret
Most people use blue sprays that contain ammonia. You can do better.
- The Recipe: 1 part white vinegar to 4 parts water, plus a half-teaspoon of cornstarch.
- The Secret: The cornstarch is the “magic” ingredient. It acts as a very fine abrasive that breaks the surface tension of the water, preventing streaks. Use a microfiber cloth or an old newspaper for a lint-free finish.
5. Faucets and Chrome: Removing Limescale
If your faucet has that white, crusty buildup:
- The Method: Soak a rag in vinegar and wrap it tightly around the faucet. Secure with a rubber band. Leave it for an hour. The acid will dissolve the calcium. For showerheads, fill a plastic bag with vinegar, submerge the head in it, and tie it off overnight.
Part V: Managing Mold and Mildew Naturally
In damp environments like bathrooms, mold is a constant threat. While bleach is the traditional “go-to,” it often only kills surface mold.
The Tea Tree Oil Powerhouse
Tea tree oil is a potent antifungal.
- Recipe: 2 teaspoons of tea tree oil in 2 cups of water.
- Method: Spray on moldy areas (like shower curtains or corners) and do not rinse. The oil needs to sit to kill the spores and prevent them from returning. The smell is strong but dissipates quickly.
The Vodka Trick
Cheap, high-proof vodka is an excellent disinfectant and mold killer. It evaporates quickly and doesn’t leave the lingering scent that vinegar does. It’s particularly effective on fabric shower liners.
Part VI: Floor Care for Kitchens and Bathrooms
Floors in these areas are high-traffic and prone to spills.
1. Tile and Linoleum
- Solution: 1/2 cup vinegar and a drop of Castile soap in a gallon of hot water.
- Engagement Tip: Add 10 drops of peppermint essential oil. Not only does it smell incredibly fresh, but peppermint is also a natural deterrent for ants and spiders.
2. Hardwood Kitchen Floors
- Solution: Use a very damp (not soaking) mop with a mixture of 1/2 cup vinegar and 1 gallon of warm water. Immediately dry with a microfiber cloth to prevent moisture damage. For a natural polish, a tiny amount of olive oil added to the mix can restore shine, but be careful—it can make the floor slippery!
Part VII: Air Quality and Deodorizing
Cleaning isn’t just about what you can see; it’s about what you can smell.
1. Simmer Pots
Instead of synthetic candles, use the stove.
- Recipe: A pot of water with orange slices, cinnamon sticks, and a splash of vanilla. Let it simmer on low. It humidifies the air and provides a deep, natural scent.
2. Baking Soda Jars
Place small jars of baking soda with a few drops of essential oil in the back of cabinets or near the trash can. The baking soda neutralizes odors rather than masking them.
Part VIII: Advanced DIY Recipes for the Dedicated Natural Cleaner
Homemade “Soft Scrub”
Perfect for sinks and tubs that need a little extra “oomph.”
- Ingredients: 1.5 cups baking soda, 1/2 cup liquid Castile soap, 2 tablespoons vinegar, and 2 tablespoons water.
- Storage: Store in a squeeze bottle. It stays moist and works like a dream on stubborn soap scum.
Natural Wood Polish (for Kitchen Cabinets)
- Ingredients: 2 parts olive oil to 1 part lemon juice.
- Method: Rub a small amount into the wood with a soft cloth. The lemon cleans, and the oil conditions the wood.
Homemade Furniture Wipes
Instead of buying disposable wipes:
- Ingredients: Cut up old cotton T-shirts into squares. Place them in a glass jar.
- Liquid: 1 cup water, 1/4 cup vinegar, 1 tablespoon olive oil, and 10 drops of lemon oil.
- Usage: Pour the liquid over the rags. Use a rag, then wash and reuse.
Part IX: Safety, Storage, and Best Practices
Even though these ingredients are “natural,” they are still chemicals.
- Label Everything: Always label your DIY bottles with the ingredients and the date.
- Test First: Always perform a spot test on an inconspicuous area, especially on stone, wood, or delicate fabrics.
- Storage: Store your cleaners in a cool, dark place. Essential oils are light-sensitive and can lose their potency if left in the sun.
- Ventilation: Even vinegar fumes can be strong. Always clean in a well-ventilated area.
- Microfiber Hygiene: Never wash microfiber cloths with fabric softener. The softener coats the fibers and destroys their ability to trap dirt.
Part X: The Environmental and Economic Long Game
When you switch to natural cleaning, you are removing hundreds of plastic bottles from the waste stream over a lifetime. You are also saving a significant amount of money.
Consider the “Cleaning Budget”:
- Average cost of a 16oz name-brand all-purpose cleaner: $4.00 – $6.00.
- Cost of 16oz DIY vinegar solution: Approximately $0.25.
Over the course of a year, a typical household can save between $200 and $500 just by switching to DIY natural solutions.
Conclusion: The Journey to a Greener Home
Transitioning to natural cleaning solutions for your kitchen and bathroom is a rewarding journey. It begins with a single bottle of vinegar and a box of baking soda. As you see the results—the sparkling faucets, the fresh-smelling microwave, and the grime-free tub—you’ll realize that the “strength” of industrial chemicals was often an illusion, a marketing tactic designed to make us dependent on expensive, harsh products.
True cleanliness doesn’t smell like bleach; it smells like nothing at all, or perhaps a faint hint of fresh citrus. It feels like the peace of mind that comes from knowing your toddler can crawl on the kitchen floor or your pet can lick the counter without ingesting toxins. By mastering these natural methods, you aren’t just cleaning your home; you are cultivating a healthier, more sustainable way of life.
Embrace the fizz of the baking soda, the power of the lemon, and the simplicity of the cloth. Your home, your health, and the planet will thank you.